Three years ago, I watched my $2,000 home gym setup crumble faster than my motivation after New Year's. The treadmill belt started slipping, my dumbbells developed rust spots, and don't even get me started on the smell coming from my yoga mats. Here's the kicker – most of it could've been prevented with 15 minutes of weekly maintenance.
Ultimate Fitness Tech Buyer's Guide
Side-by-side comparison of the best smartwatches, fitness trackers, and health monitors for every budget.
Look, I get it. You invested in home gym equipment to work out, not become a maintenance technician. But here's what I learned the hard way: proper care extends equipment life by 300-400% on average. That expensive rowing machine? It'll outlast your current fitness goals with the right attention.
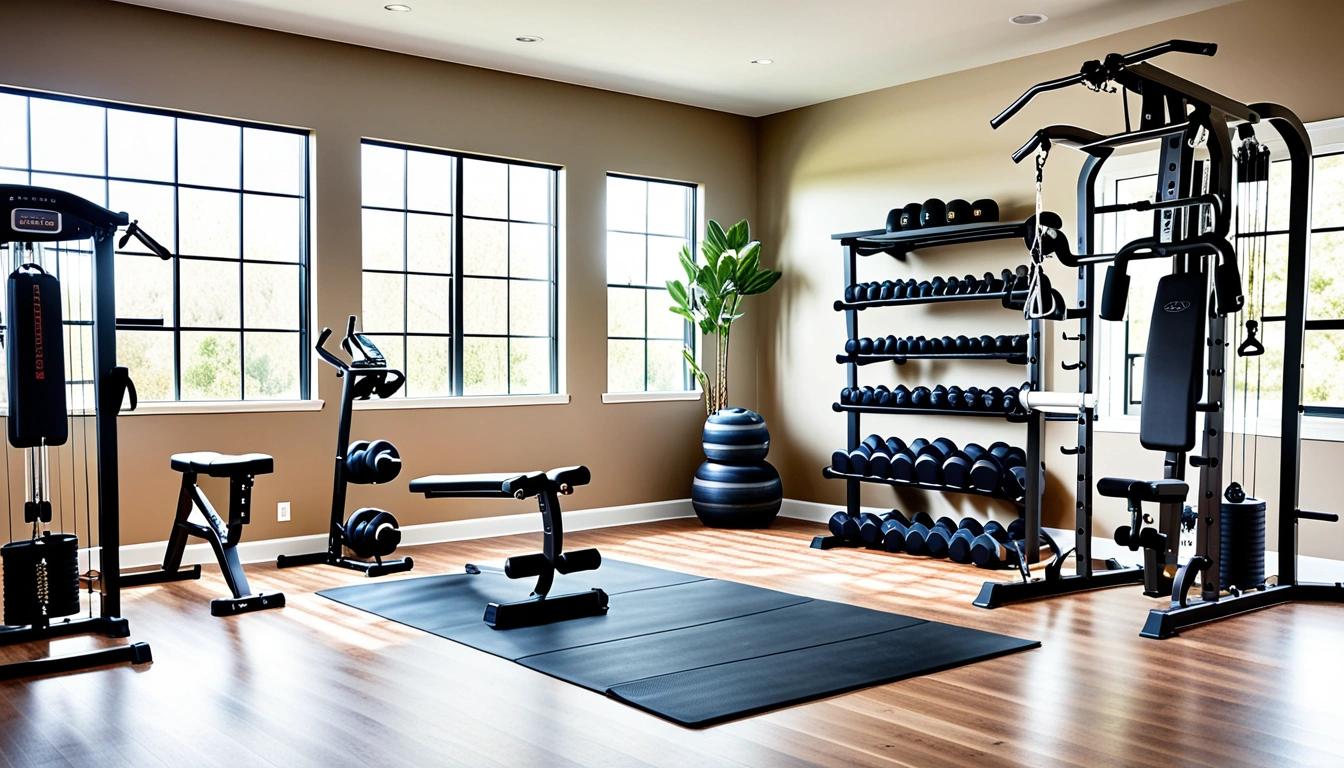
I've spent the last five years testing, breaking (unfortunately), and maintaining every piece of home gym gear you can imagine. From basic resistance bands to commercial-grade power racks, I'll share the exact maintenance routines that keep my equipment performing like new – and save you thousands in premature replacements.
Essential Cleaning Protocols for Different Equipment Types
Sweat is your equipment's biggest enemy. I learned this after finding corrosion on my barbell knurling just six months after purchase. The chloride in sweat creates an acidic environment that eats through protective coatings and raw metal alike.
Daily Post-Workout Cleaning
Every single workout ends the same way in my gym: equipment wipedown. This isn't optional if you want your gear to last. I keep microfiber cloths stationed around my space – one near the cardio area, another by the weights.
For metal surfaces (barbells, dumbbells, machine frames), I use a slightly damp cloth followed immediately by a dry one. Moisture sitting on metal overnight is asking for rust problems. I've seen expensive Olympic barbells develop surface rust in humid climates within weeks of neglect.
Vinyl and leather surfaces need different treatment. I use antibacterial wipes on my bench press and adjustable bench after every session. The key is non-alcohol based cleaners – alcohol dries out vinyl and causes cracking over time.
Weekly Deep Cleaning
Sundays are deep clean day in my gym. This is when I tackle the stuff daily cleaning misses. Cable machines get special attention – I wipe down every inch of cable I can reach and clean the pulleys with a small brush.
Cardio equipment requires the most thorough weekly cleaning. Treadmill belts accumulate dirt and debris that creates uneven wear patterns. I vacuum underneath and around the motor housing, then clean the belt with a manufacturer-approved cleaner.
For my rowing machine, I disassemble what I can and clean the rail with a damp cloth. The seat rollers get wiped down, and I check for hair or debris wrapped around the wheels.
Simple Green Pro HD Heavy-Duty Cleaner
This commercial-grade cleaner handles the toughest gym equipment buildup without damaging surfaces.
- Safe for metal, vinyl, and rubber surfaces
- Concentrated formula – one bottle lasts months
- Non-toxic and biodegradable
Monthly Equipment Breakdown
Once a month, I do what I call “equipment surgery.” This means partially disassembling what I can safely take apart for thorough cleaning and inspection.
My adjustable dumbbells get completely broken down. I clean each weight plate individually and lubricate the adjustment mechanism. Same goes for my power rack – I remove the J-hooks and safety bars for individual cleaning and inspection.
Resistance bands get stretched and inspected under good lighting. I'm looking for micro-tears, worn spots, or areas where the latex is becoming thin or discolored.
Proper Storage Solutions That Extend Equipment Life
Storage killed my first set of resistance bands. I tossed them in a gym bag after workouts, and within six months they were permanently stretched and developing weak spots. Proper storage isn't just about organization – it's about preserving the integrity of your equipment.
Environmental Control
Your home gym's environment directly impacts equipment longevity. I learned this after moving my setup from a climate-controlled bedroom to an unfinished basement. The humidity wreaked havoc on everything metal within months.
Ideal conditions are 50-70°F with 30-50% humidity. I use a small dehumidifier in my basement gym and monitor levels with a digital hygrometer. It's a small investment that's saved me thousands in equipment replacement.
Direct sunlight is another killer. UV rays break down rubber and plastic components surprisingly quickly. My first set of resistance tubes developed surface cracks after six months near a south-facing window.
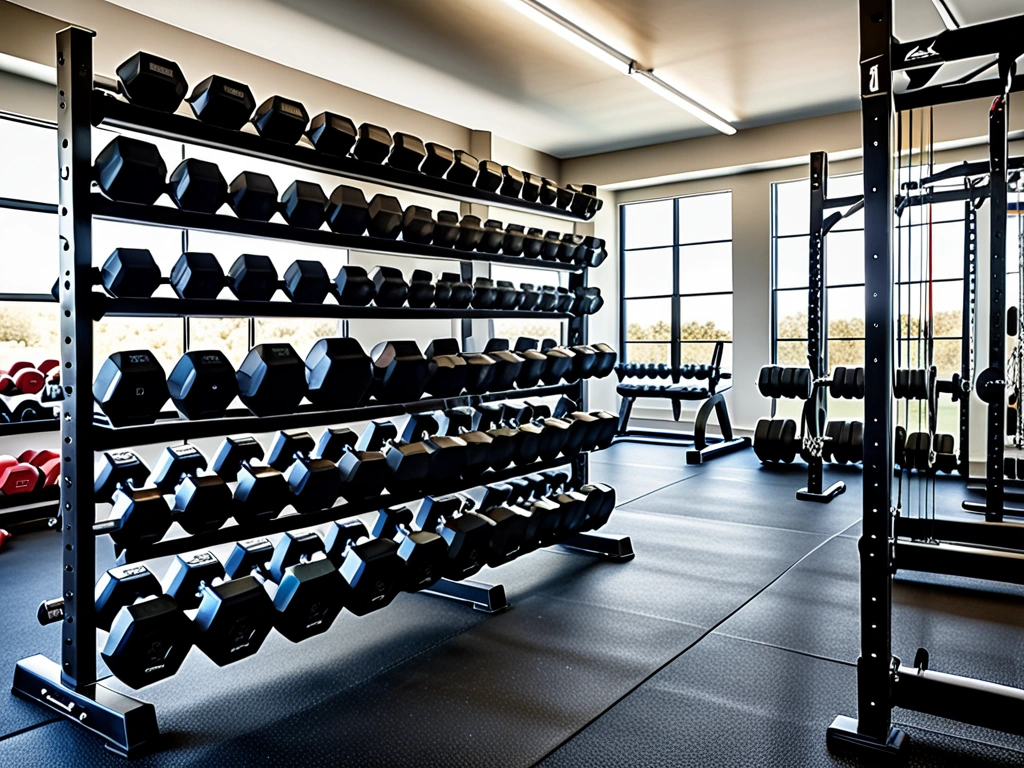
Weight Storage Systems
Dumbbells scattered on the floor aren't just a safety hazard – they're developing flat spots and dings that affect their balance. I invested in a proper dumbbell rack after my hexagonal weights started rolling differently due to floor damage.
Olympic plates need vertical storage or proper horizontal stacking. Leaning them against walls puts stress on one edge and can cause warping over time, especially with bumper plates.
Cable and Band Storage
Resistance bands and cables have memory – store them improperly and they'll develop permanent kinks or weak spots. I hang all my bands on individual hooks, avoiding any sharp bends or tight coils.
Cable machines should have cables in their natural resting position when not in use. Don't leave weight stacks partially lifted – this keeps constant tension on the cables and pulleys.
DIY Repairs That Save Hundreds in Service Calls
I've saved over $3,000 in service calls by learning basic equipment repairs. Most home gym fixes are surprisingly simple once you understand the common failure points.
Cardio Machine Maintenance
Treadmill belt alignment is the most common issue I encounter. When the belt starts drifting to one side, most people panic and call for service. Here's the fix: locate the adjustment bolts at the rear of the machine (usually hex keys) and make small quarter-turn adjustments while the belt is running slowly.
If the belt drifts left, tighten the left bolt slightly. If it drifts right, tighten the right bolt. Make tiny adjustments – a quarter turn can make a huge difference.
Exercise bike squeaks usually come from the seat post or pedal bearings. I keep marine grease on hand for seat post maintenance and 3-in-1 oil for pedal bearings. These $5 fixes prevent $200 service calls.
WD-40 Specialist White Lithium Grease
Perfect for exercise equipment maintenance – long-lasting lubrication that won't attract dirt and debris.
Weight Equipment Fixes
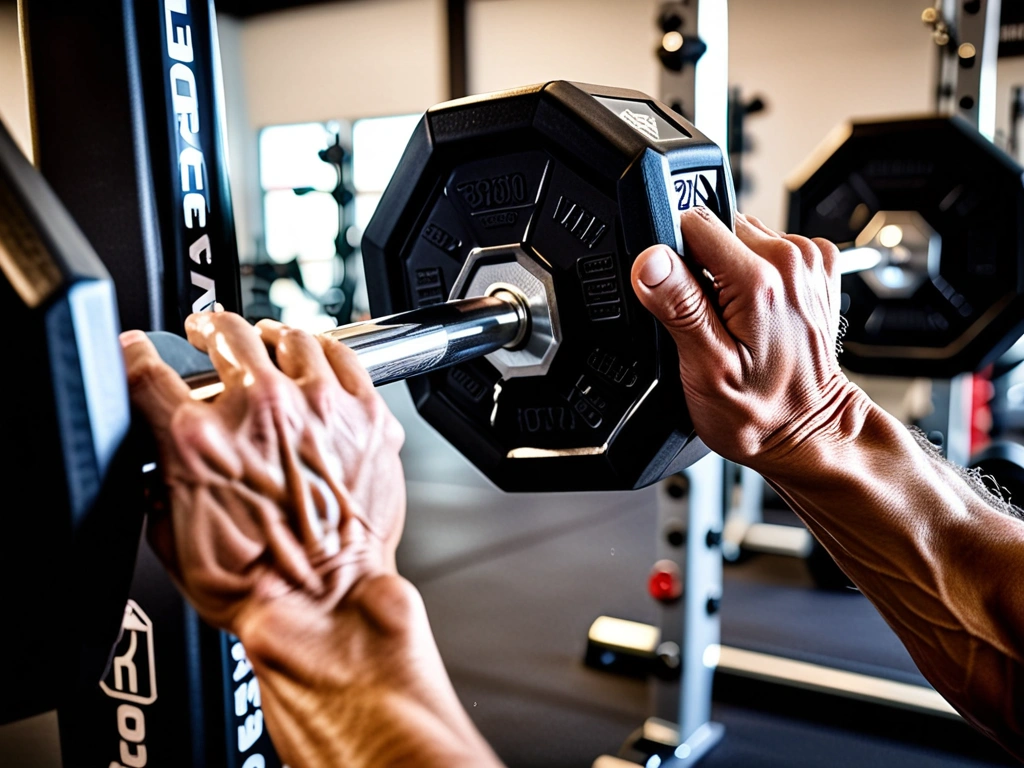
Barbell sleeve maintenance is crucial for smooth rotation. When sleeves start binding or making noise, it's usually dried lubricant or debris in the bearings. I remove the end caps (if possible) and clean the bearing area with degreaser, then apply a small amount of bearing grease.
Adjustable dumbbells have more complex mechanisms, but most issues stem from debris in the selection dials or worn adjustment pins. Regular cleaning and light lubrication of moving parts prevents most problems.
Cable fraying is a safety issue that needs immediate attention. Small frays can be temporarily secured with cable clamps, but any significant damage requires cable replacement. Don't mess around with this – a snapped cable under load can cause serious injury.
Upholstery and Padding Repairs
Small tears in vinyl upholstery can be repaired with vinyl repair kits before they become major problems. I keep a basic kit that matches my bench colors. The key is catching tears early – once they spread, you're looking at full reupholstery.
Foam padding that's compressed or developing flat spots can sometimes be revived by fluffing and rotating. If that doesn't work, replacement foam is usually available from the manufacturer or upholstery suppliers.
Recognizing When It's Time for Equipment Replacement
Knowing when to repair versus replace has saved me from throwing good money after bad. I've learned the hard way that some equipment reaches a point where continued maintenance isn't cost-effective or safe.
Safety-Critical Wear Points
Certain wear points are non-negotiable safety issues. Cracked welds on power racks or weight machines are immediate replacement signals – no exceptions. I inspect all structural welds monthly with a flashlight, looking for hairline cracks or rust that could indicate metal fatigue.
Cable equipment has obvious failure points. Any fraying beyond surface level, kinks that won't straighten, or cables that have lost their flexibility need immediate replacement. I've seen cables snap under light loads after showing these warning signs.
Weight plates with significant chips or cracks aren't just cosmetic issues. Damaged plates can have shifted weight distribution that affects lifting form and safety. Plus, chips can damage other equipment or flooring.
Economic Replacement Thresholds
I use the 50% rule for repair decisions. If a repair costs more than 50% of replacement value, I replace the equipment. This applies especially to cardio machines where motor or computer replacements can cost $800-1200 on a $1500 machine.
Age is another factor. Equipment over 10 years old often has discontinued parts or outdated safety standards. My old treadmill hit this point when the motor controller failed – replacement parts cost more than a newer, safer model.
Frequency of repairs matters too. If I'm fixing the same piece of equipment every few months, it's telling me the underlying systems are failing. At that point, I'm just postponing the inevitable while dealing with constant downtime.
Performance Degradation Signs
Some equipment fails gradually rather than catastrophically. My first elliptical developed a wobble that progressively worsened over six months. By the time I addressed it, the problem had damaged multiple components that would've been fine with earlier intervention.
Inconsistent resistance in adjustable equipment is another gradual failure mode. When resistance levels don't feel consistent or adjustment mechanisms become unreliable, it's often more cost-effective to replace than rebuild the internal systems.
Noise levels can indicate internal wear. Equipment that's become significantly louder over time usually has worn bearings, loose components, or failing motors. While not immediately dangerous, these issues typically cascade into more expensive problems.
Professional-Grade Maintenance Products That Actually Work
After trying dozens of cleaning and maintenance products, I've settled on a core toolkit that handles 95% of home gym maintenance needs. These aren't the cheapest options, but they're the most effective and economical in the long run.
Cleaning Arsenal
My go-to cleaner for most surfaces is Simple Green Pro HD. It's concentrated, so one bottle lasts months, and it's safe on virtually every surface I encounter. For metal surfaces, I follow up with WD-40 Specialist Corrosion Inhibitor to prevent rust formation.
Microfiber cloths are essential – I probably go through 20 per week between daily cleaning and laundry rotation. The key is having enough so you're never using a dirty cloth. I buy them in bulk and replace them quarterly.
For deep cleaning, I use an automotive interior cleaner (Chemical Guys Total Interior) on vinyl surfaces. It cleans better than gym-specific products and leaves a protective coating that repels sweat and oils.
Lubrication Products
White lithium grease is my standard lubricant for most equipment bearings and moving parts. It doesn't attract dirt like oil-based lubricants and provides long-lasting protection. I use marine grease for parts exposed to high moisture.
For cables and precision mechanisms, I prefer dry lubricants. Graphite spray works well for adjustable dumbbell mechanisms and doesn't collect debris like wet lubricants.
3-in-1 oil handles light lubrication needs like pedal bearings and seat adjustment mechanisms. A small bottle lasts years and prevents the majority of squeaks and binding issues.
Specialty Tools
A basic tool kit handles most maintenance needs. I keep Allen wrenches (both metric and standard), adjustable wrenches, and a variety of screwdrivers specifically for gym equipment. Having the right tools prevents damage from improvised fixes.
A digital torque wrench was a game-changer for proper assembly and maintenance. Over-tightening bolts is surprisingly common and can damage threads or crack components. Under-tightening creates safety hazards.
Cable tension gauge helps ensure proper adjustment on cable machines. Uneven cable tension causes premature wear and affects exercise smoothness. Most people adjust by feel, but a gauge ensures consistency.
Park Tool TW-5.2 Ratcheting Click Type Torque Wrench
Professional-grade precision for proper equipment assembly and maintenance without over-tightening.
Preventive Maintenance Schedule
Consistency beats perfection in equipment maintenance. I've developed a schedule that takes about 30 minutes per week total but prevents hours of major repairs later.
Daily (2 minutes): Wipe down used equipment with microfiber cloth. Check for obvious issues like loose bolts or unusual noises.
Weekly (15 minutes): Deep clean all surfaces, vacuum around equipment, check cable tension and alignment on cardio machines.
Monthly (30 minutes): Lubricate moving parts, inspect for wear patterns, tighten hardware, test safety features.
Quarterly (1 hour): Partial disassembly for thorough cleaning, replace worn consumables (grips, pads), update maintenance log.
Frequently Asked Questions
How often should I clean my home gym equipment?
Daily cleaning after each use prevents sweat damage and bacteria buildup. I wipe down all touched surfaces with a microfiber cloth immediately after workouts. Weekly deep cleaning with appropriate cleaners handles what daily maintenance misses. This routine extends equipment life by 3-4 times compared to sporadic cleaning.
What's the biggest mistake people make with equipment maintenance?
Letting moisture sit on equipment overnight. Sweat contains salt and acids that corrode metal surfaces surprisingly quickly. I've seen expensive barbells develop rust spots within weeks in humid climates. Always wipe equipment dry immediately after use, even if you're planning to clean it more thoroughly later.
Which equipment needs the most frequent maintenance?
Cardio machines with moving parts require the most attention. Treadmills need weekly belt cleaning and monthly lubrication. Rowing machines need rail cleaning and chain lubrication every few weeks. Weight equipment is generally more forgiving, but cable machines need regular inspection for fraying or wear.
Can I use household cleaners on my gym equipment?
Most household cleaners are too harsh for equipment surfaces. Bleach and ammonia-based cleaners can damage vinyl and rubber components. I stick with pH-neutral cleaners designed for multiple surfaces. Automotive interior cleaners work excellently on gym equipment and provide protective coatings.
How do I prevent rust on metal equipment in a humid basement gym?
Control humidity with a dehumidifier – aim for 30-50% relative humidity. I use a small residential dehumidifier that runs continuously and monitor levels with a digital hygrometer. Apply corrosion inhibitor to metal surfaces monthly, and ensure excellent air circulation around equipment. Never store equipment while damp.
When should I call a professional for equipment repairs?
Any electrical issues, structural damage to frames, or safety system failures need professional attention. I handle basic maintenance like lubrication, cleaning, and minor adjustments, but motor problems, cracked welds, or complex electronic issues require qualified technicians. The cost of professional repair usually pays for itself in safety and proper diagnosis.
What maintenance supplies should every home gym owner have?
Start with quality microfiber cloths, pH-neutral cleaner, white lithium grease, and basic tools (Allen wrenches, adjustable wrench). Add 3-in-1 oil for light lubrication and vinyl cleaner for upholstered surfaces. This basic kit handles 90% of home gym maintenance needs for under $50 total investment.
🎯 Our Top Recommendation
After maintaining hundreds of pieces of equipment, we recommend starting with the Simple Green Pro HD Heavy-Duty Cleaner as your foundation cleaning product. It's safe, effective, and handles 90% of your cleaning needs without damaging any surfaces.
